Building the Sensor
Dec 4th, 2014 by boses5
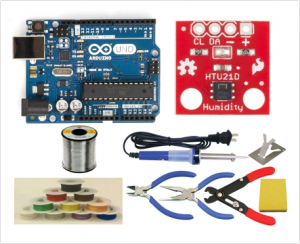
Supplies
- Hardware:
- Arduino Uno and USB AB Cable
- HTU21D Humidity and Temperature Sensor
- Soldering Supplies:
- Wire (Yellow, Black, Red)
- Wire Strippers
- Electrical Tape
- Solder
- Soldering Iron
- Wet Sponge
Method to wire circuits
- Cut equal lengths of each color wire. The length is whatever you desire based on the application. Ideally you want to keep the Arduino Uno out of the elements, we recommend about a foot.
- Strip ends of the wire ¼ in
- Tin the ends of the wire by heating it with the soldering iron then coating it with a thin layer of solder
- Heat the the surface on the sensor and wire with soldering iron and apply solder to the join. Soldering iron can be cleaned by wiping on wet sponge to remove excess solder
- This is a reference that we used http://www.sciencebuddies.org/science-fair-projects/project_ideas/Elec_primer-solder.shtml
- Insert the wire into the appropriate slot according to the circuit diagram
- Wrap any wire with exposed wire and/or solder in electrical tape to prevent shorting
Programming Arduino
- Download and install Arduino software onto computer http://arduino.cc/en/main/software
- Load code (With SD Card or Without SD Card)
- Click to compile and verify code (Shown to the right)

- Plug in Arduino with the micro USB cable and click the upload button (Shown to the right)

- Hit the reset button on your Arduino (Circled in red)
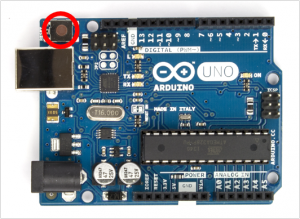
- Congratulations you can now run the sensor
HTU21D Arduino Schematic:
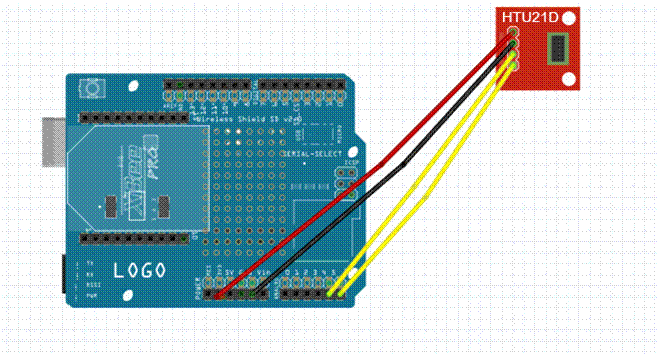
The power pin on the HTU21D is connected to the 3.3V pin on the Arduino, and ground is connected to the ground pin. SDA is connected to Analog Pin 4, and SCL is connected to Analog Pin 5.