Prototype Iterations
Nov 24th, 2014 by pearse3
Reflective sheet application
For this design, we used special reflective material applied to a metal sheet metal surface. This was to ensure the most efficient transfer of solar energy to the tube, but also to replicate what had been done in Ghana. From seeing documentation on different DIY solar collector designs, however, we have reason to believe that this specialty material is not necessary in creating a successful reflector. Even a polished sheet of metal may suffice.
Materials needed:
- Reflector sheet (ours was aluminum sheet metal)
- ReflecTech film (other whatever other reflective material)
- Student ID card (works better than a credit card!)
- Sponge, water, and soap
- Ideally, at least two people to work on applying the film
Process
- Alter reflective film to fit on reflector sheet as needed
- Clean aluminum sheet thoroughly with water and soap so that there are no particulates that can get underneath the film
- Spray the aluminum surface with water and a few drops of soap. Adding soap helps to break the water’s surface tension. Make sure that the surface is wet and soapy throughout the entire process.
- Expose the adhesive side of the reflective sheet to start applying it to the aluminum.
- Use the student ID card to flatten out the bubbles. Work inch by inch, holding the card at a 45 degree angle to push bubbles out of the film. Doing this will secure the film to the aluminum. Be sure to do this even if no initial bubbles appear–the soap needs to be removed as much as possible, or it when the film settles bubbles will eventually form.
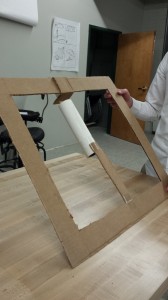
Prototype 1

This was a prototype created quickly out of cardboard for early and immediate testing in order to understand how the solar tube works, and to establish early testing methods. Although far from perfect, this prototype was a good proof of concept and confirmed the direction of designs in the future. This prototype also served as a functional prototype to practice centering the tube at the focus of the parabola.
3D-Printed Prototype

This prototype was used solely to model the new frame design for the next full-sized model. This allowed us to dimension the frame to properly center the tube at the focus of the parabola, while using minimal materials.
Prototype 2
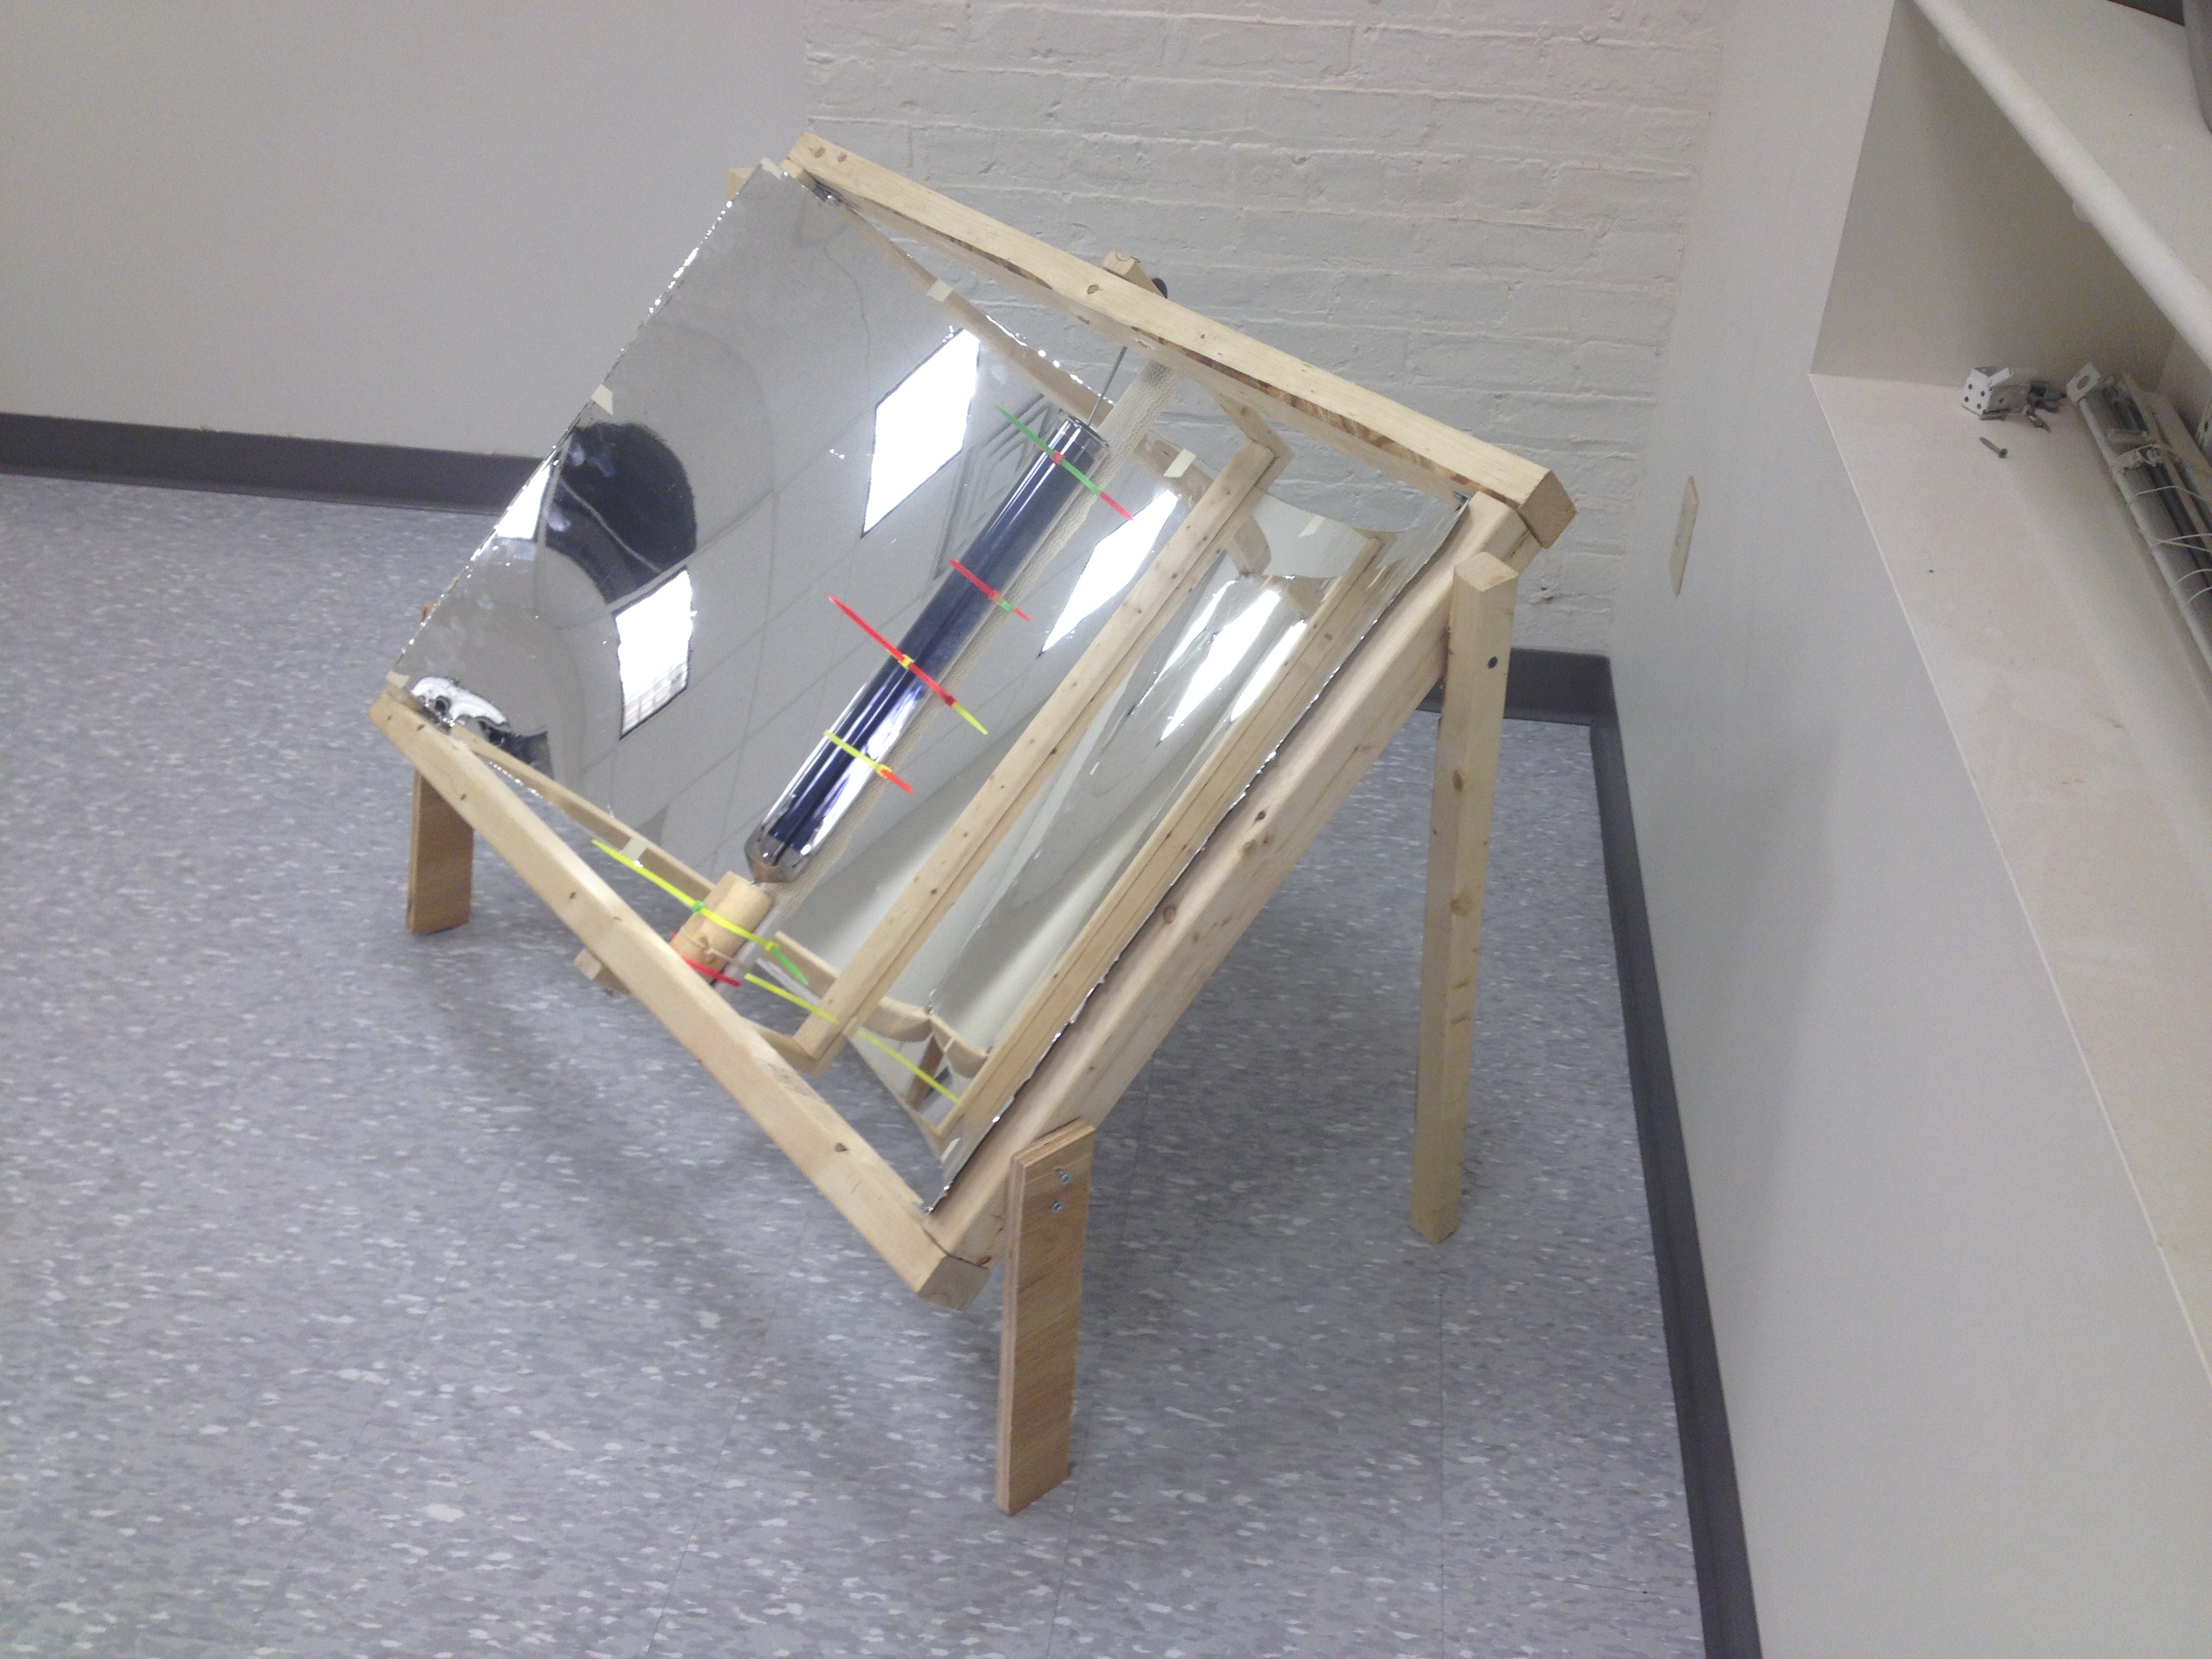
Our second prototype was a higher fidelity prototype in which we measured an accurate parabola and created a frame. The solar tube was attached to a rod with zip strips. This prototype reached 350 degrees F and higher. It also unfortunately melted our thermometer. During a second test with biochar, the temperature reached over 500 degrees F and exceeded the teams’ performance expectations (performance was better than that of past years).
Both teams gained valuable insight from the second prototype. The first was that considerations had to be made regarding the reflector’s angle and how it would be held at that angle. For the final ideal design, the frame would have to be driven by a motorized heliostat system, but for the purpose of testing, this was outfitted with adjustable wooden legs that held the reflector at 45 degrees. Another insight was that the design of the tube fixture did not lend itself to easily measuring temperature. Often, the thermometer was held too close to the heated end of the tube. In the first case, the thermometer was held directly on the tube and this caused it to melt and also max out the temperature. The second thermometer got held too close while testing biochar, again maxing the temperature at above 500 degrees F and damaging the infrared sensor on the laser thermometer.
Cardboard Prototype 2
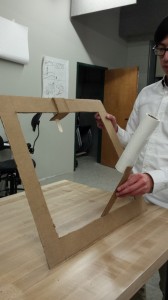
Whether the solar tube design is applied to biochar or Adinkra ink, it is important to incorporate an easy easy to get contents in and out of the tube. Therefore, a hinge on the bottom side of the frame was added to Prototype 2. This hinge allows the user to easily pour out the contents inside by pivoting around to tilt the opening downwards. This prototype also explored the options of eliminating the bar all the way across the bottom-side of the solar tube, which was partially blocking it from reflection.
Prototype 3
Another prototype was built based on the design of Cardboard Prototype 2. With two metal strips that have holes pre-punched and some silicon padding for added grip, this prototype held onto the solar tube securely, even when the hinge mechanism rotates the tube to a free hanging position. Added benefits of the hinge include safer temperature measurements, easy poring into an evaporation tray during Adinkra ink production , etc. The now two-section fixture also successfully held the solar tube along the focus of the parabola. This prototype was later put into further testing upon completion.