Arduino:
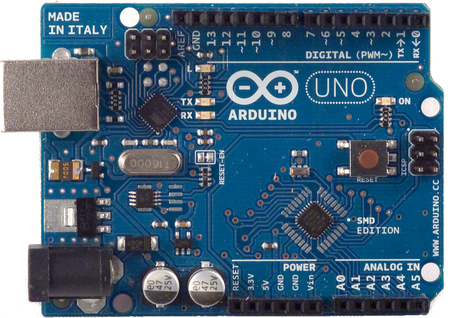 Arduinos are cheap and easy-to-use microcontrollers. They have a small amount of processing power, and can be used to send different signals across different pins, which can be in turn connected to a wide selection of sensors, switches, LEDs, etc. There are several different types of pins that can be utilized on the board. The most important are the power and ground pins. The power pins allow the user to give a steady supply of power at either 5V or 3.3V. to any part of the circuit. The ground pins allow any part of the circuit to be grounded, thus completing the circuit. The next set of pins is Analog, and these can be used to input or output an analog signal. These are useful when working with sensors that give a binary or hexadecimal readout. The last set of pins is Digital. They are the opposite of Analog pins, and allow a digital signal to be either inputted or outputted.
There are also several pins within the Digital pin section that have the ability to output a PWM signal. PWM stands for pulse width modulation, and alternates the power on-off cycle of the pin at an extremely fast rate. The amount of time the power is on is changed relative to the amount of time the power is off. This can be used for several different things, mainly fading LEDs and giving the proper pulsewidth signal to a motor or servo to change speed or position, respectively.
HTU21D Humidity and Temperature Sensor: 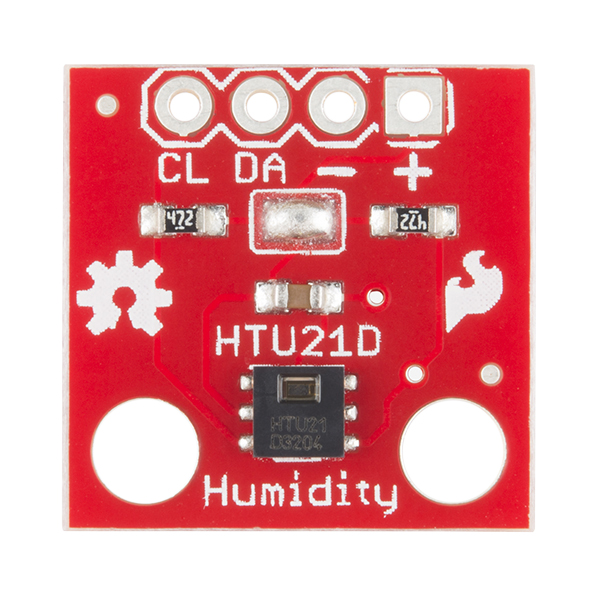
The sensor used in this project was the HTU21D. This sensor has the ability to read temperature and humidity. There are four pins on the sensor chip – a power line (3.3V input), ground, SDA (Serial Data Line), and SCL (Serial Clock Line). SDA is used by the arduino to read data off the sensor. Reading the sensor uses I2C, and allows the microcontroller on the Arduino to read data from different addresses on the sensor. These different addresses correspond to the different values that can be read from the sensor – namely temperature and humidity. SCL, on the other hand, is used to synchronize the system clock for the microcontroller with the clock in the sensor. They are both set to 9600 baud. This makes sure that the microcontroller and the sensor operate at the same frequency.
Adafruit SD Card Arduino Shield: 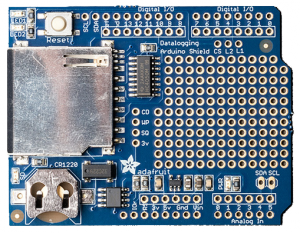
This shield allows users to log temperature and humidity indefinitely, assuming there is enough space on the SD card and there is a constant source of power. The assembly with the Arduino is very easy, and requires very basic soldering knowledge. The only thing necessary before use is to solder on header pins. After that, it can simply be plugged in on top of the Arduino. The SD card can be removed at any time and plugged into a computer to view the data logs. The data is outputted in the form of a text file, where each line is each printed Serial line from the Serial Output Window.
The shield itself provides all the necessary connections to the Arduino, while still allowing all of the pins to be used. By adding headers to the shield, the pins can be extended through it and become usable again, above the shield. Plugging in the SD card is as simple as that – once the card is plugged in, the board will automatically recognize it, and the SD card integration code can be used to log data. If there is no SD card in the slot, however, the SD card integration code will not be able to run.