How-To/DIY Projects
Nov 24th, 2014 by ukleja
The Music & Sound Earthquake Simulator is completely open source. There are many possible projects and activities that students can perform with this simulator.
MAKING THE SIMULATOR:
To make the simulator, you will need the following materials:
– a container (approximately 12″ x 12″; just make sure it is large enough to hold the medium and buildings)
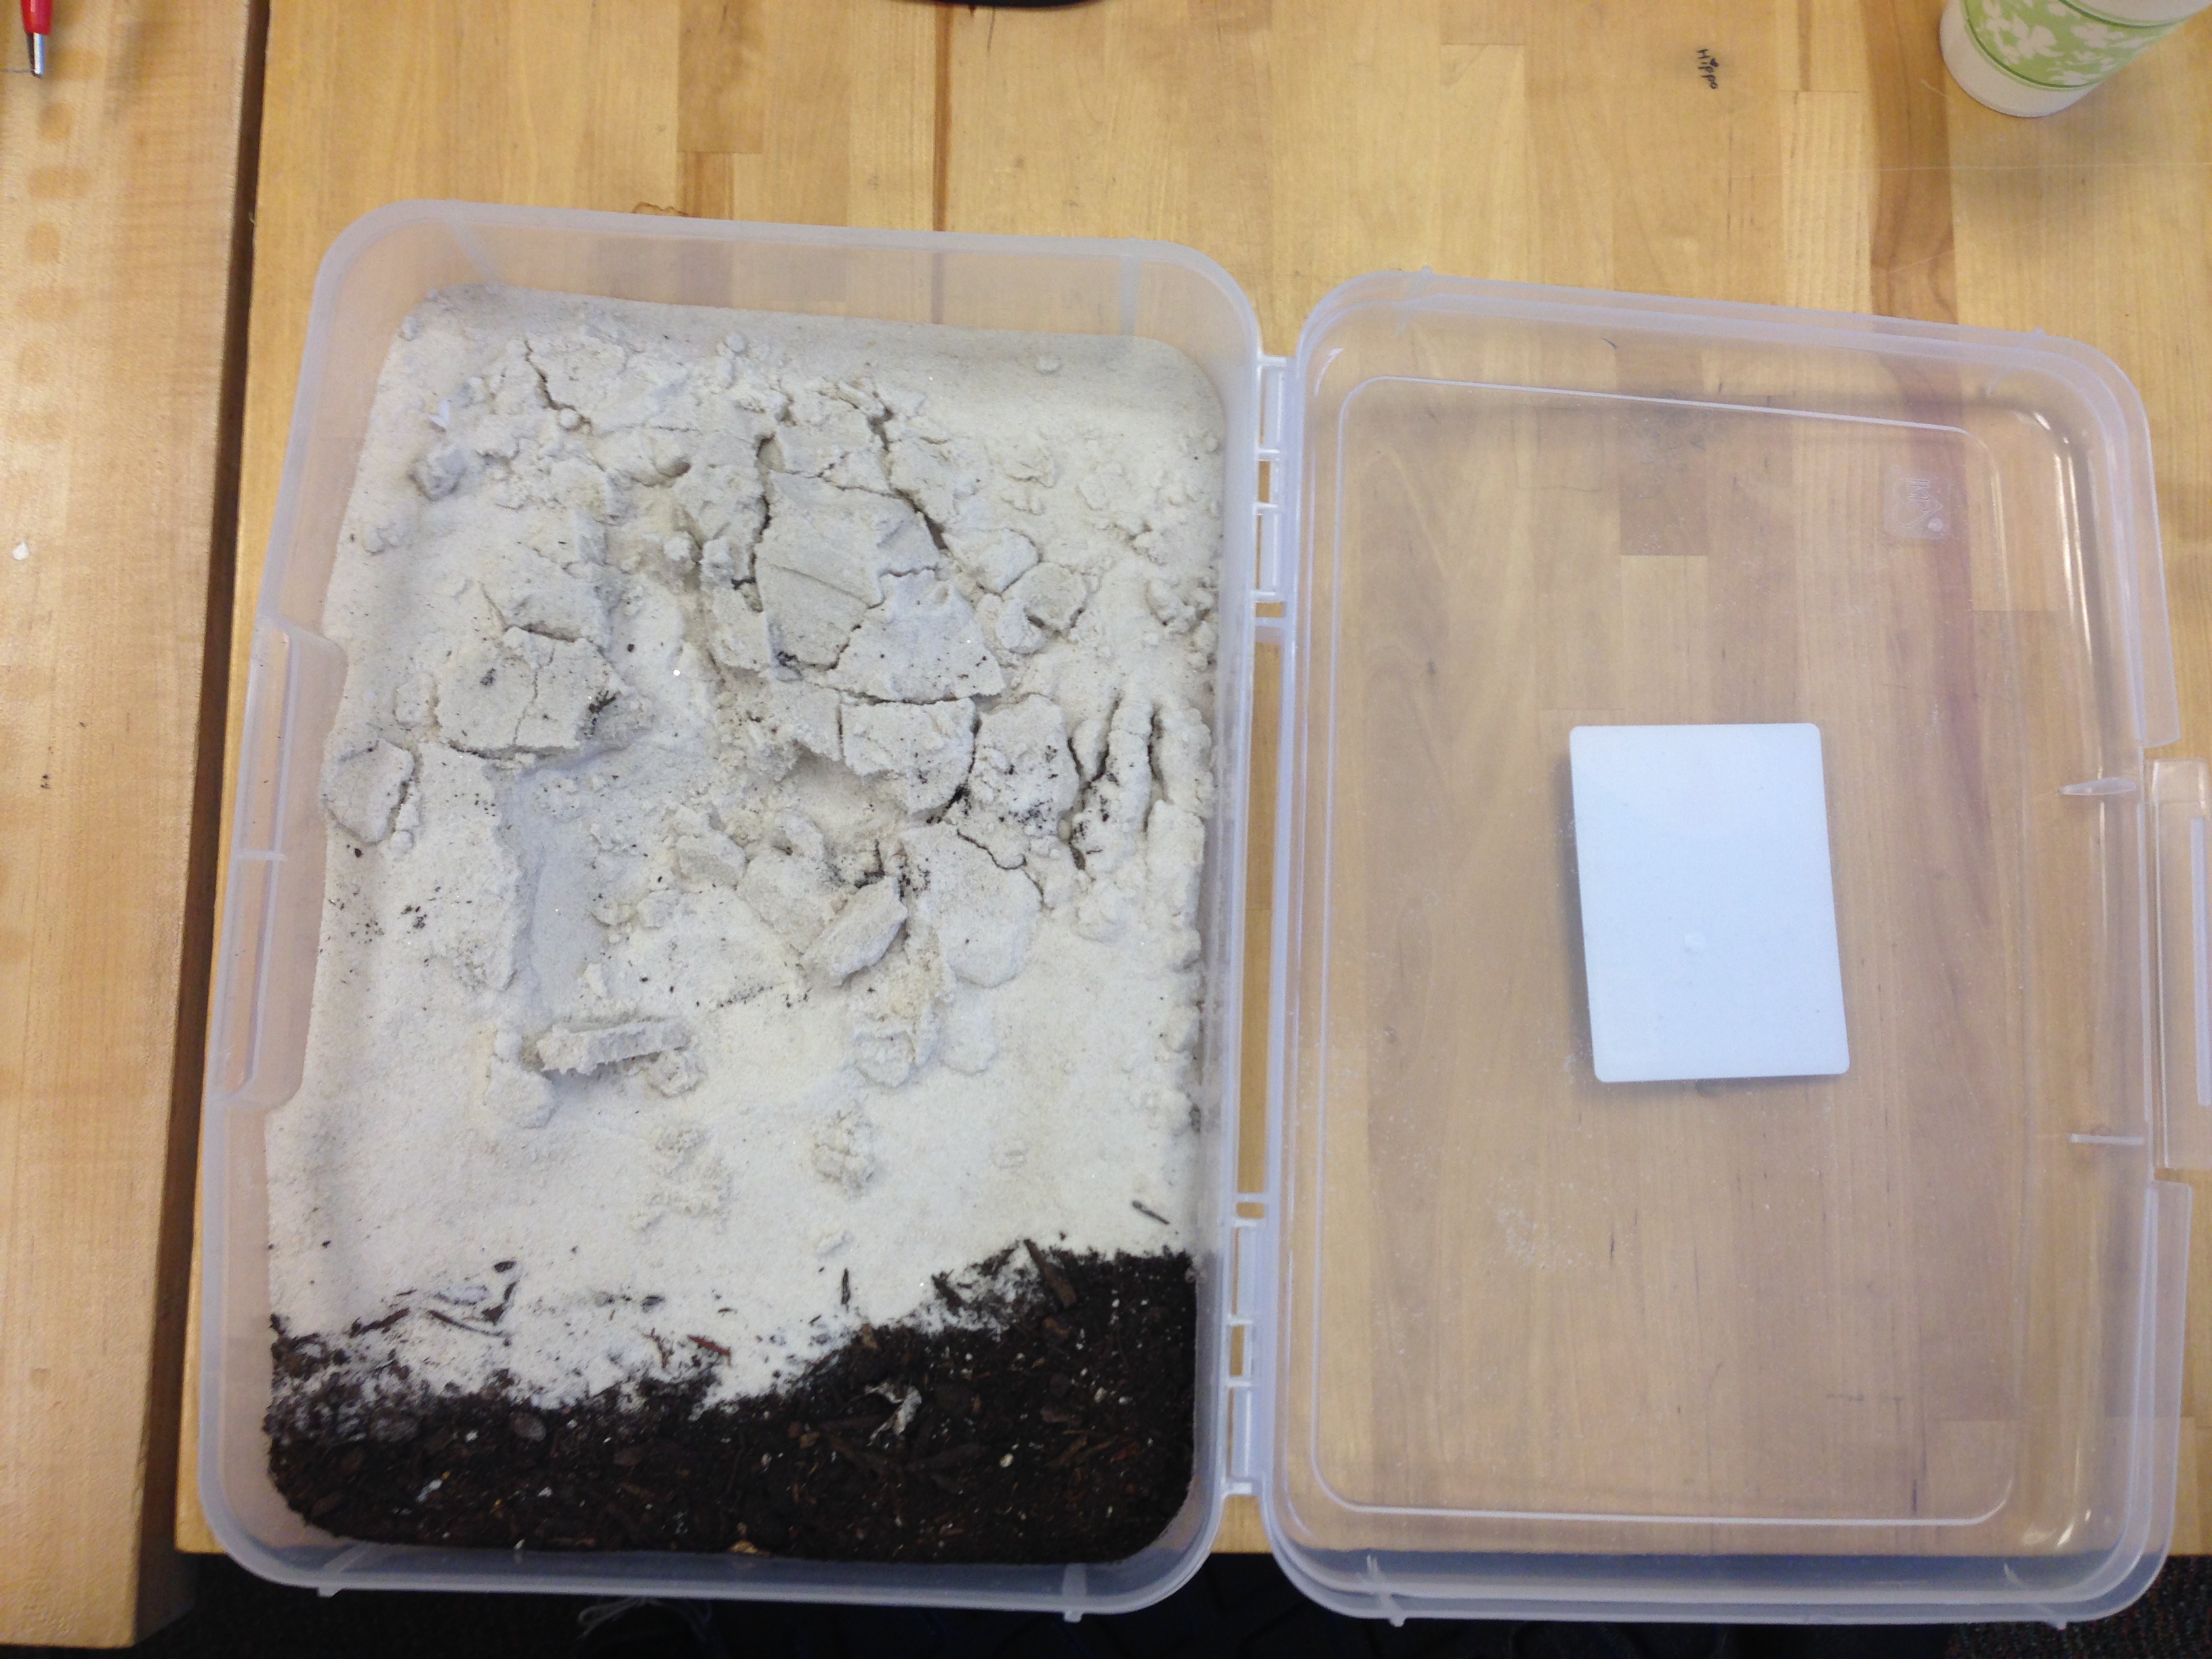
Container (with sand & soil)
– a tactile transducer (or a speaker, but this will not work as well)

Tactile transducer
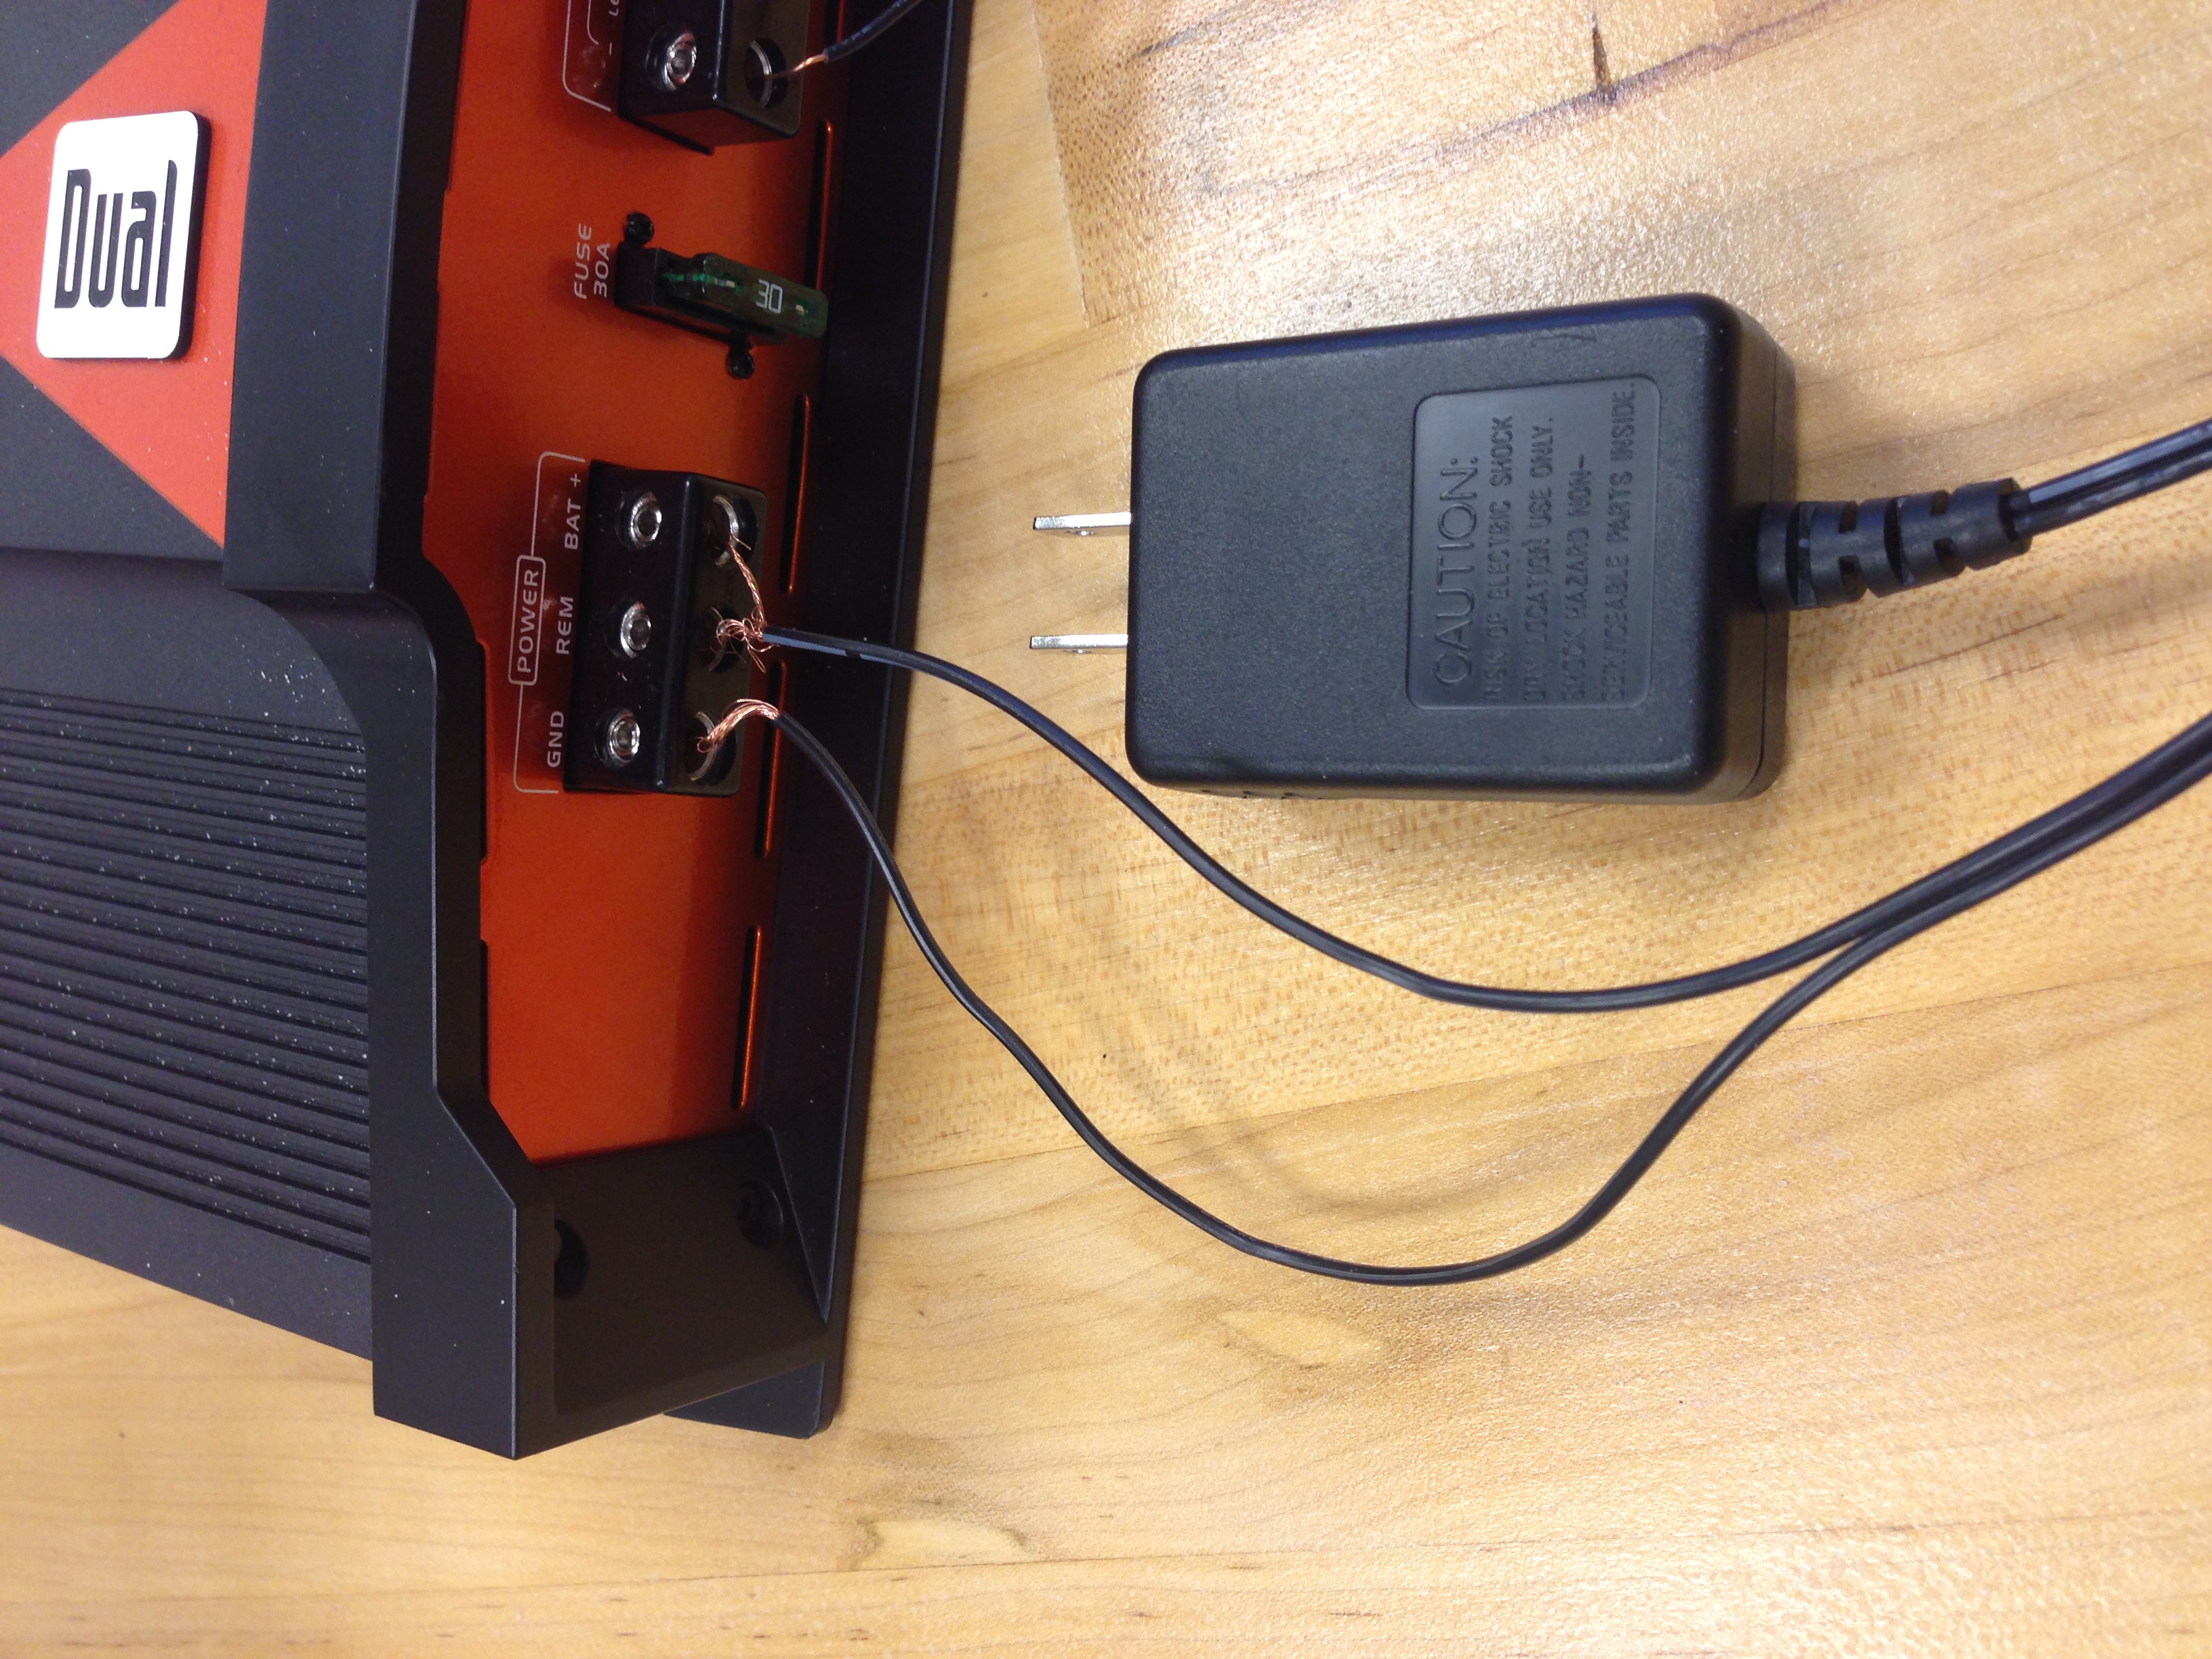
– an amplifier

Amplifier
– some type of medium to simulate “earth” (sand works well, but this can really be anything: dirt, rocks, beads, jello, etc.)
– some type of building material (have fun with this! you can use jenga blocks, jello, sand, etc.)
– various wire s (with plugs) and alligator clips (as needed)
– wire with plug for outlet
SETTING UP THE AMP:
STEP 1: Connect the wire with the outlet plug to the Power connections on the amp.
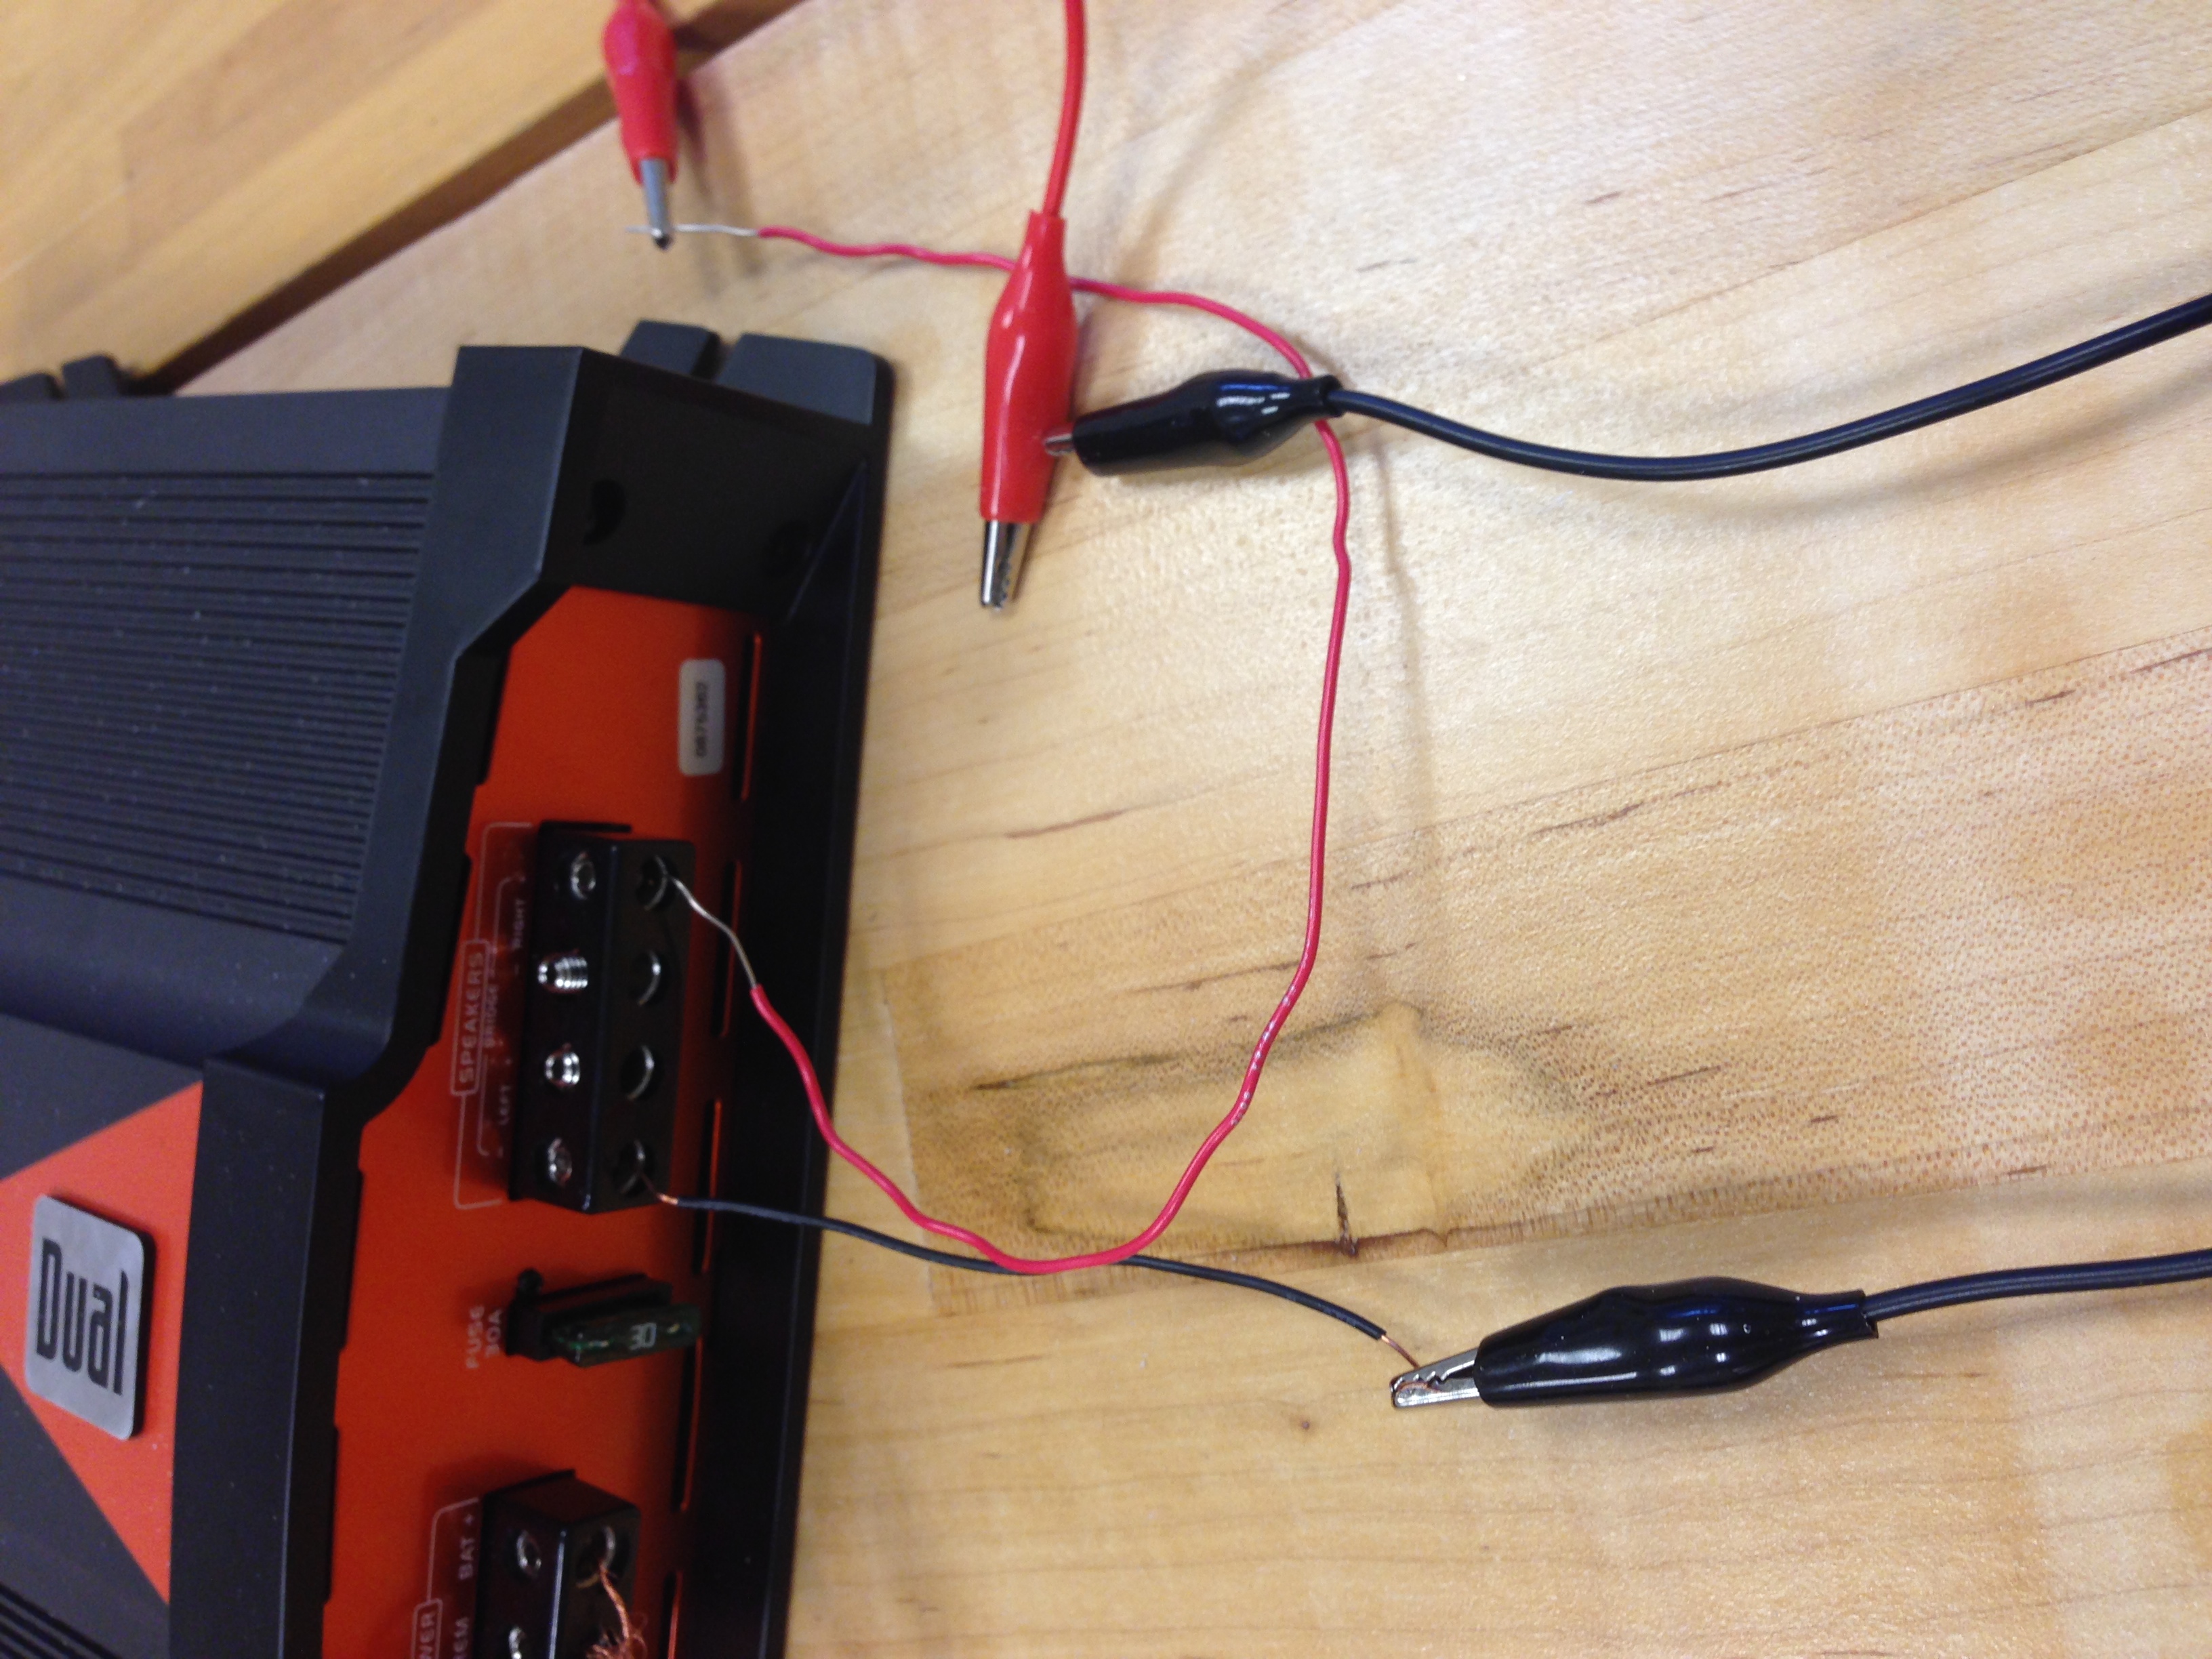
STEP 2: Connect the ground (black) and power (red) wires to the ground and power of the Speaker connections on the amp (the other ends of these wires will be connected to the transducer later).
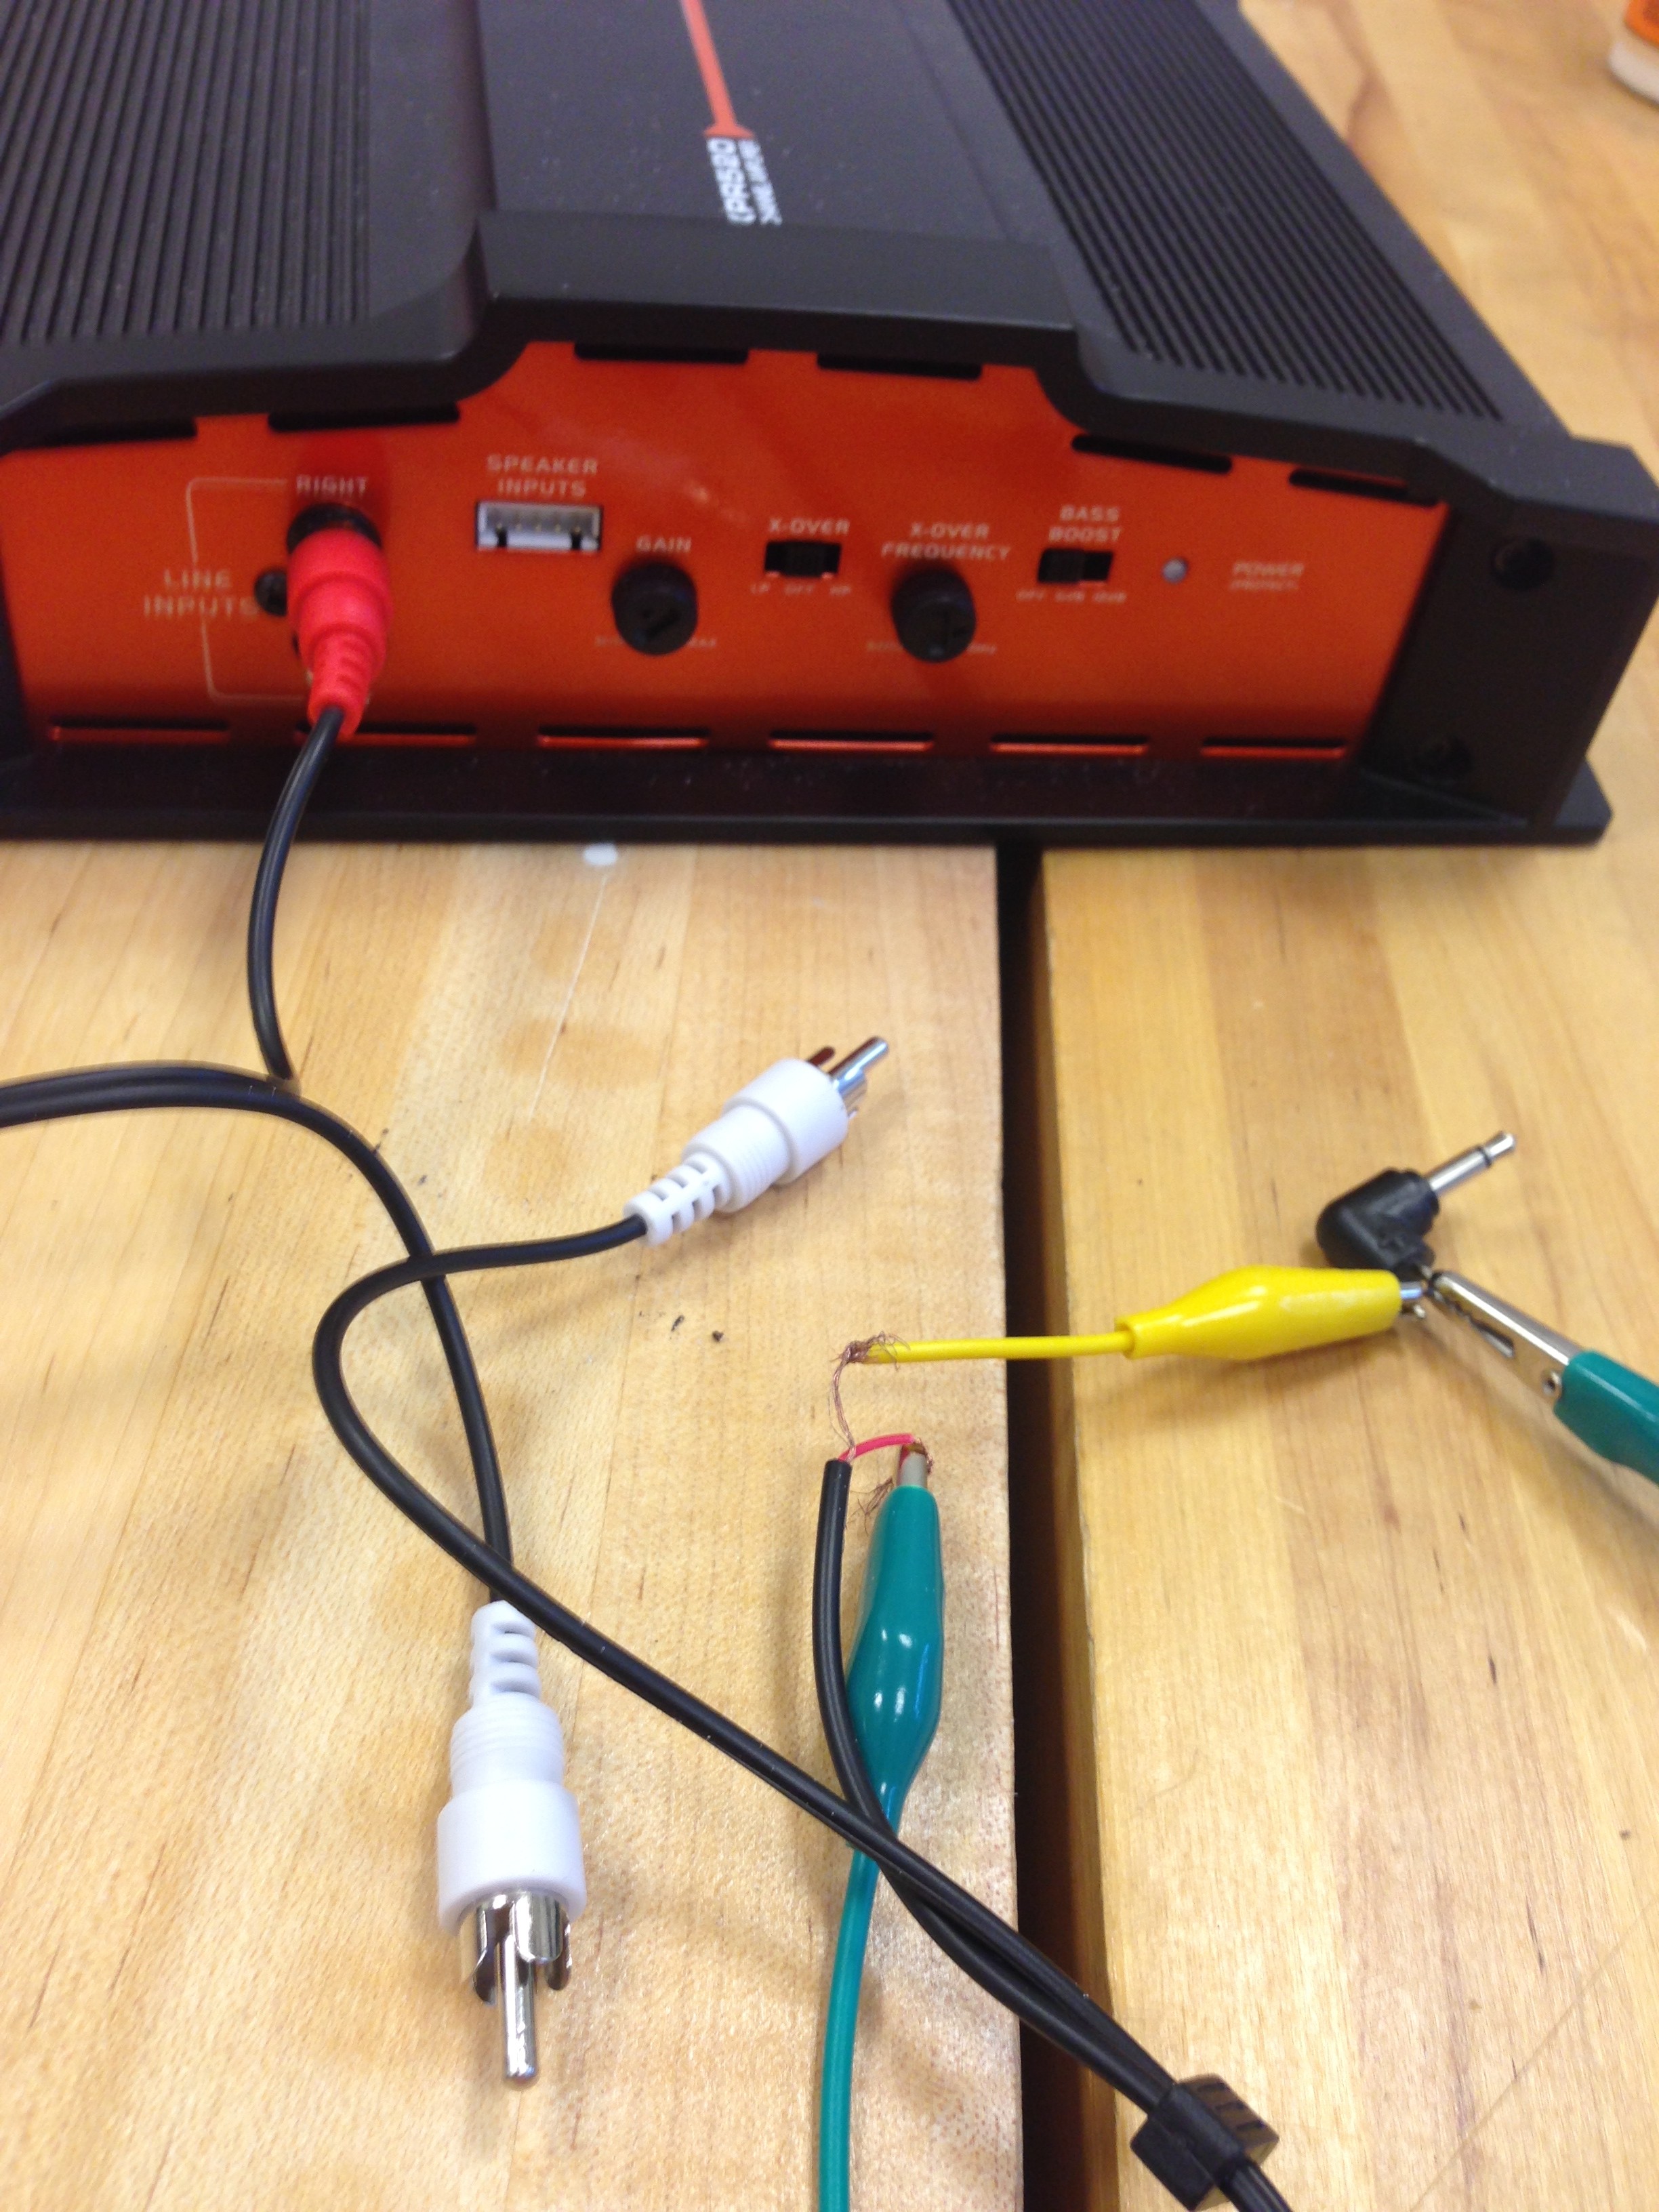
STEP 3: Connect a wire with two plugs to the Line Inputs on the amplifier. Depending on the type of wire, the other end may need to be cut open to reveal the power and ground (this can be seen in the image below with the yellow and green alligator clips); these will then need to be connected to a plug with two independent leads. This plug is what will be inserted into the laptop, iPhone, etc.
BUILDING THE SIMULATOR:
STEP 1: Place the tactile transducer in the container. Cover it with your medium (if you are using jello, consider covering the transducer with saran wrap). Make sure the positive and negative leads are sticking out of the sand.
STEP 2: Connect the leads of the transducer to the amp. Connect the amplifer to power and add a connecting plug to allow input from a device (iphone, laptop, etc.)
STEP 3: Start building and playing music!
DIY Project Ideas:
These projects focus on testing various building materials; suggestions for other enhancements are always welcome. Explore!
1) Select a song with a strong bass, or use a bass test video from youtube. Have students compete to build the strongest structure using jenga blocks. Time how long each structure takes to fall down.
2) Create a rectangular frame using wooden dowels. Place the frame in a rectangular container and cover with jello. Let the jello harden and then test how the vibrations affect the structure.
3) Create sand castles/structures to test.
4) Connect the device to an output screen and graph the waves (this is difficult to do if you use a song; try finding a single tone. There are apps that let you generate single tones, where you can control the amplitude, frequency, etc.)